Getting Your Ducks (and Sparkies) in a Row - The Renovation Pecking Order
If I had a dollar for every time I've been asked or have seen this question pop up in an online forum, I could probably happily retire to the Southern Highlands full time. "What order do trades actually go in?", "Is my builder skipping steps?", "Why is the electrician back for the third time?!" It comes up constantly, and honestly, I get why.
Whether you're a first-time renovator trying to wrap your head around the process, or someone who just wants to keep a builder or trade honest (or cut through the odd load of bullsh**) and not be talked in circles, understanding the general order of works gives you something really valuable. Confidence. It means you can ask the right questions at the right time, spot when something feels off, and generally feel less like you're along for the wild ride on your own project.
Before I dive in, a few important caveats. Every single renovation is different, and this is the ideal order based on a very standard, run of the mill renovation. Things like structural damage, termite damage, mould, asbestos, or heritage requirements can all shift this order around. So, think of this as a general roadmap rather than gospel. Your builder may need to deviate, and that's not necessarily a red flag, it's often just the reality of working with an existing home and renovating in 2026 when trades are in high demand so sometimes you have to secure them when available despite it not being the most ideal time.
Get your Architect and Interior Designer in the room together, early

Before we even get into the order of works, I want to talk about something that happens far too often and causes so much unnecessary stress and cost blowout later on.
Time and time again, clients come to me once the overall layout and structure of the house has already been designed, and the DA has already been approved. We sit down to go through the requirements for each room, and it becomes very clear, very quickly, that what they actually want simply isn't achievable given the shape or size of the room, ceiling heights, or the location of fixed elements like windows and doors.
A client wants a living room with a 75 inch TV, a fireplace, an 8 seater modular L shaped lounge and a spot for their beloved family heirloom sideboard. Sounds reasonable enough, until you realise we're working with very limited wall space because two of the four walls are taken up by beautiful (but oversized) windows. The remaining two walls are either interrupted by internal doors, or directly face those windows, which means the TV gets glare cast across it for half the day. Suddenly the dream configuration doesn't fit the room that's been built for it….. shocker.
These are exactly the kinds of things that need to be considered before the DA is lodged, not after. Otherwise, you're left with two options, neither of them fun. Sacrifice the layout you actually wanted or go back and adjust the design and relodge the DA for reassessment. In layman's terms - more time + more money.
A lot of this comes down to a genuine misunderstanding of what an Architect does versus what an Interior Designer does. At a very simple level, the Architect develops the exterior shell and structural elements of the home, while the Interior Designer designs the entirety of how the internal spaces actually function and feel (and that means wall locations, layouts, placement of doors/windows/skylights, ceiling heights – you get the drift). Yes, there are unicorn Architects who are wonderful at interiors, and Interior Designers who love a good structural challenge, but after nearly 15 years in this industry, I can tell you that you will always get the best outcome when the two professions work together as a team, collaborating from the start on your behalf. Bring them in together, early, and save yourself the heartache and financial distress.
Now, onto the order of works. Admittedly, this next part is a little dry, but it’s useful, I promise. Grab a coffee and let’s get into it.
The (typical) order of works
1. Demolition: every renovation starts with demolition. This is where all existing elements that are being replaced or altered are removed so the space can essentially be stripped back to a workable shell.
Depending on the scope of the project, this can include cabinetry, flooring, wall linings, plumbing fixtures, electrical components, or even entire walls and ceilings. Plumbing and electrical services are disconnected during this stage (where required), so it’s critical that everything is properly capped off by a licensed professional and made safe to avoid water leaks, gas leaks, or electrical hazards.
Demolition can also be the stage where unexpected problems first reveal themselves. Once walls, floors, and ceilings are opened up, hidden structural issues, water damage, mould, termite activity, or outdated building work can suddenly come to light, which is often why renovation budgets and timelines need a contingency buffer built in from the beginning.
2. Framing and structural work: once the site has been cleared out, the structural and framing works begin.
This stage is all about reshaping the home and preparing the structure for the new layout. It may involve framing new walls, removing existing walls, installing structural beams or supports, adding bracing, or even altering roof structures if features like vaulted ceilings are being introduced.
This is also the point where experienced builders and designers will think ahead about anything heavy or wall-mounted that needs additional support concealed within the walls. Floating shelves, wall-hung vanities, stone fireplace cladding, large TVs, floating desks, and custom joinery often require extra noggins or reinforcement to be installed now while the framing is exposed and accessible.
It’s one of those stages homeowners rarely think about, but it’s incredibly important for ensuring everything functions properly long term.
3. Rough in of Services: once the framing is complete, the trades move in to complete what’s known as the “rough-in” stage.
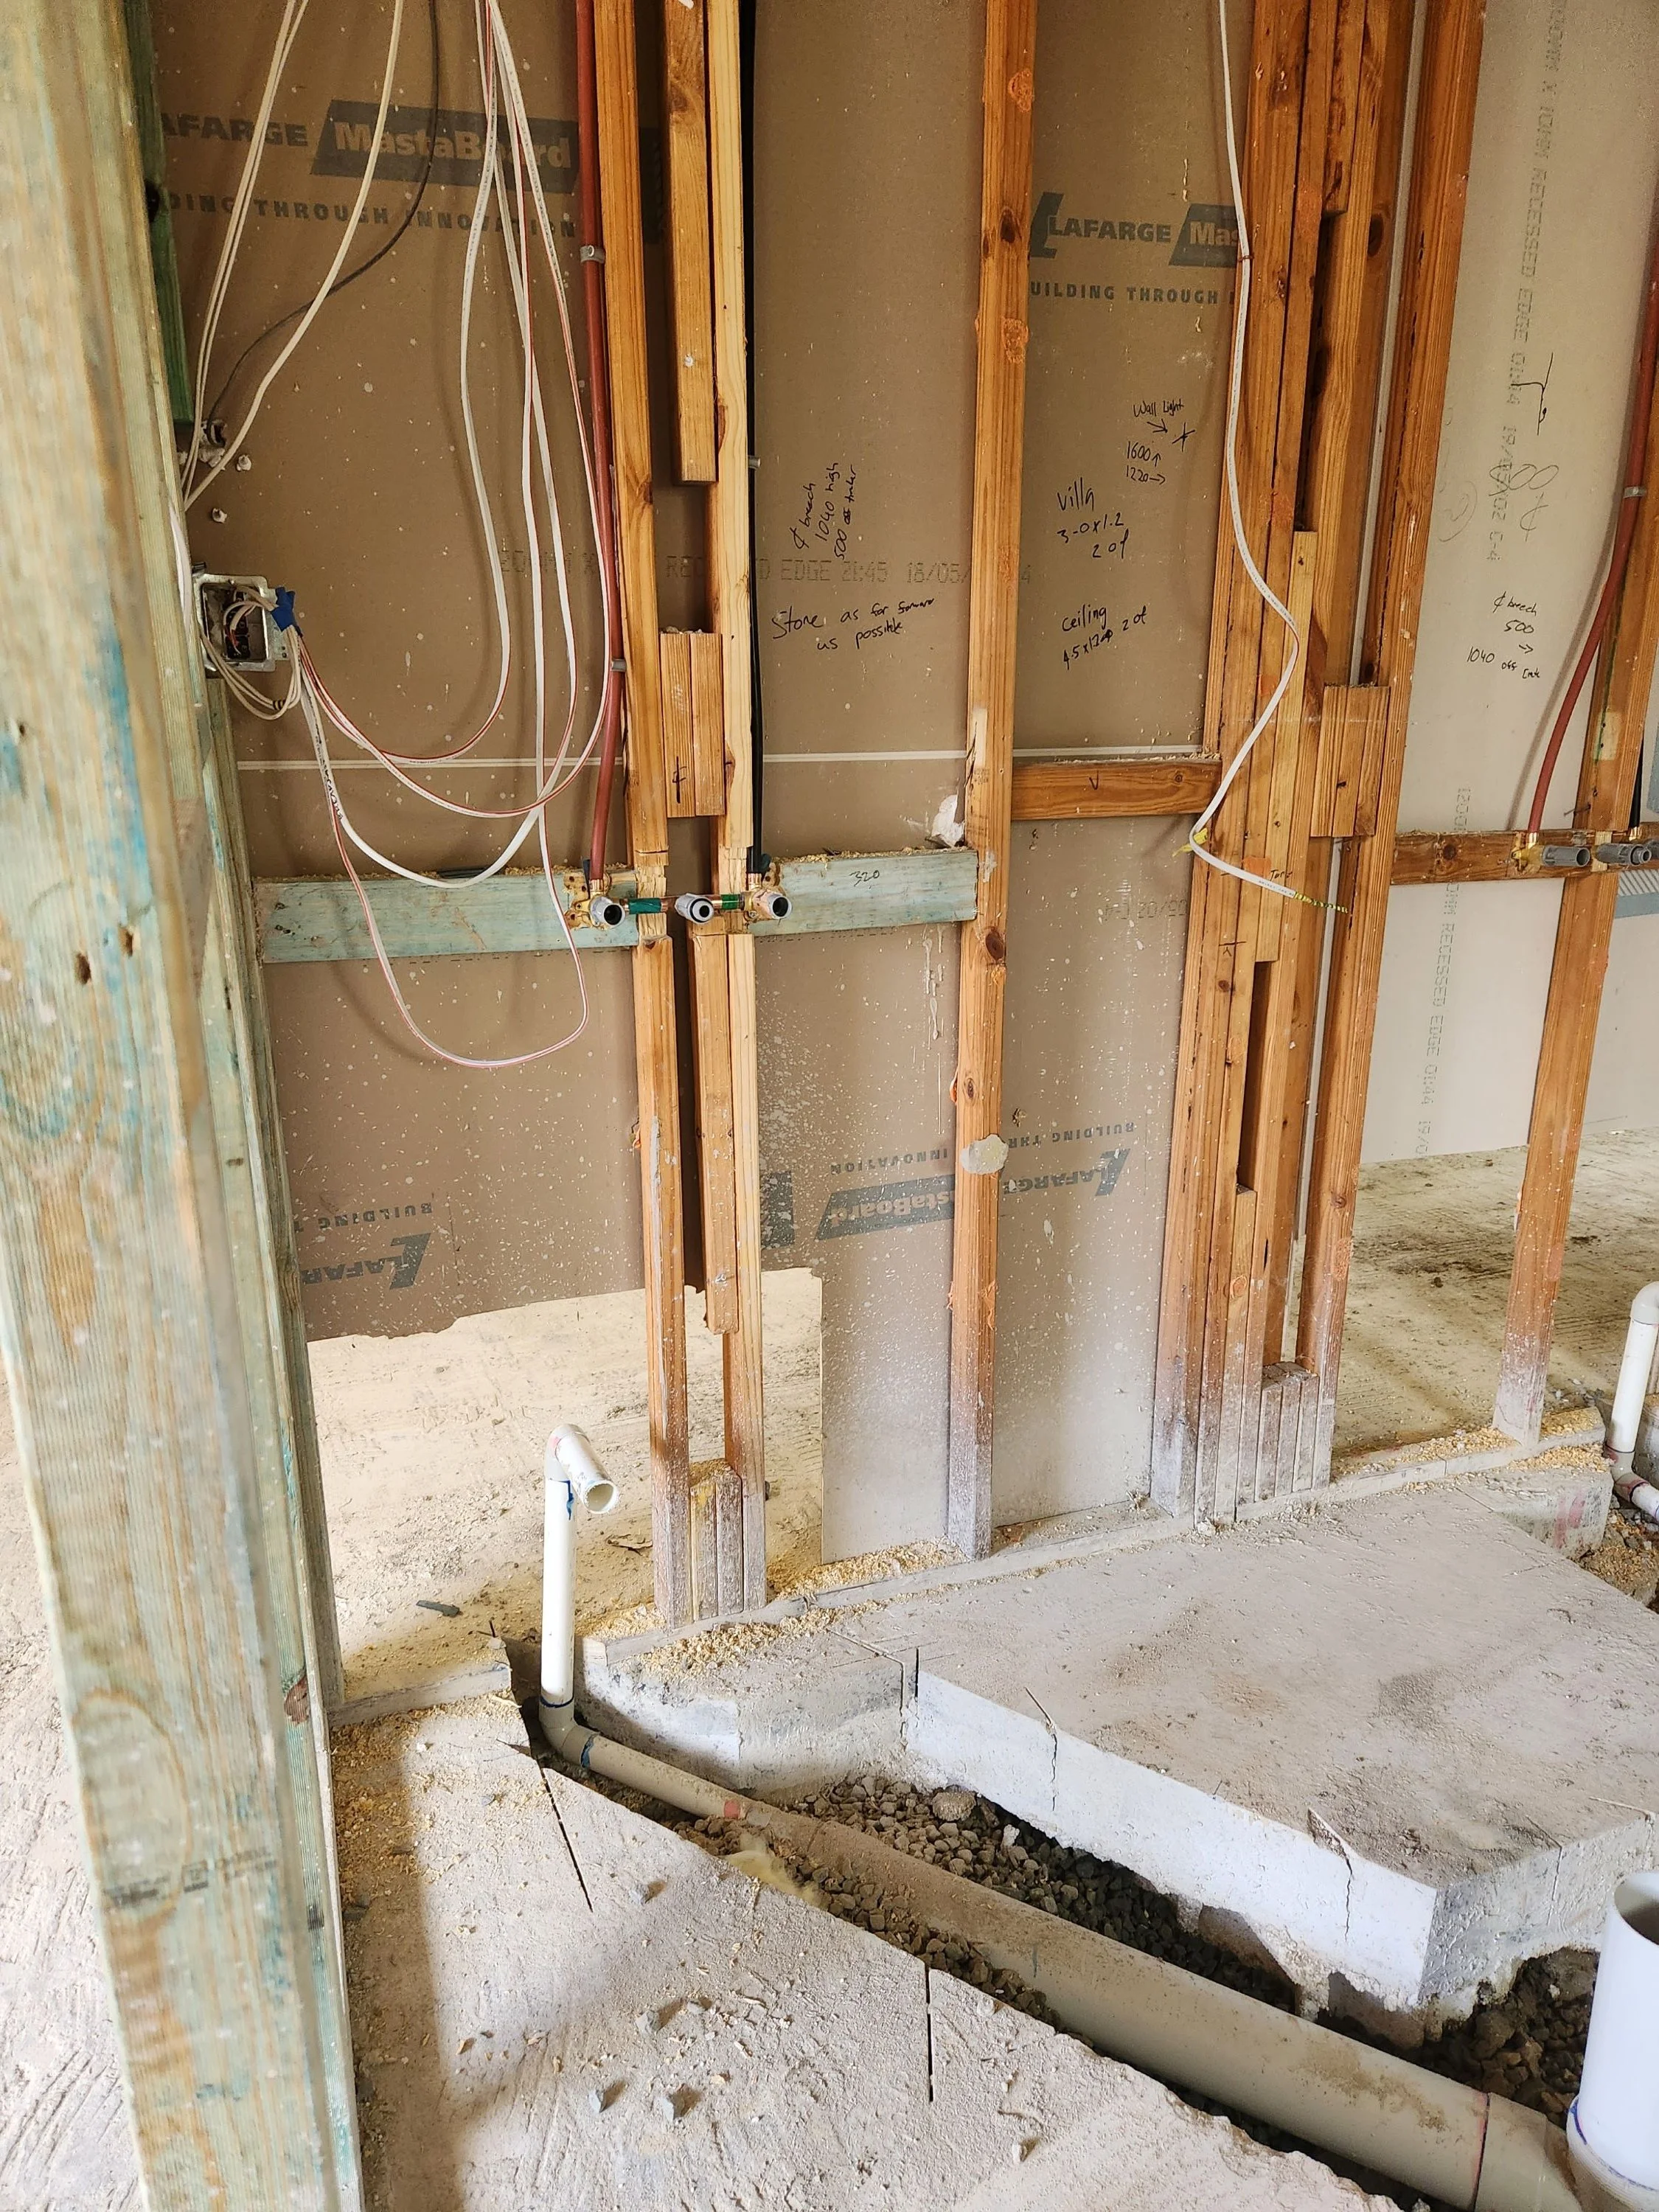
This is where plumbing, electrical, HVAC (Heating, Ventilation, and Air Conditioning), data cabling, appliance provisions, and other core services are installed while the walls and ceilings are still open. It allows the trades easy access before everything gets enclosed behind plasterboard.
This stage can feel chaotic onsite because multiple trades are often working around each other simultaneously, but it’s a critical part of the process and one where good planning makes a huge difference.
4. Wall & Ceiling Linings: once the rough-in stage is complete, the walls and ceilings can finally be enclosed.
In most homes this means plasterboard, but depending on the design, it may also include feature linings like V-groove panelling, beadboard, or shiplap. Once installed, the surfaces are set, sanded, and prepared by the plasterer so they’re ready for paint and other finishes.
Architraves, skirtings, and cornices are often installed during this stage where possible, although some trims may need to wait until after the joinery has been installed so they can finish neatly against cabinetry.
5. Doors and windows: Doors and windows are generally installed relatively early in the process.
While some internal doors may occasionally be fitted slightly later depending on flooring levels or sequencing, external doors and windows are usually prioritised so the house can be properly secured and weather protected.
6. Waterproofing: Wet areas like bathrooms, ensuites, and laundries are waterproofed once the wall linings and floor preparations are complete.
This is one of the most important stages of the renovation process and absolutely not something you want shortcuts taken on. Proper waterproofing is essential for protecting the home from long-term water damage and should always be completed in accordance with Australian Standards.
7. Paint throughout: the bulk of the painting is usually completed before flooring, joinery, and many of the final finishes are installed. Painters can work faster without worrying as much about damaging finished floors, cabinetry, or fixtures, and there’s far less risk of accidental spills or scratches on newly installed surfaces.
8. Flooring installation: flooring is generally installed next, although the exact timing can vary depending on the type of flooring being used. This stage may include timber flooring, tiles, carpet, hybrid flooring, laminate, or stone.
The sequencing here is particularly important because not all flooring products should be installed beneath cabinetry or joinery. See the next point for additional details.
9. Joinery installation: once the flooring stage is complete, or partially complete depending on the flooring type, the joinery installation begins. This includes kitchens, vanities, wardrobes, laundries, custom storage, entertainment units, and built-in desks.
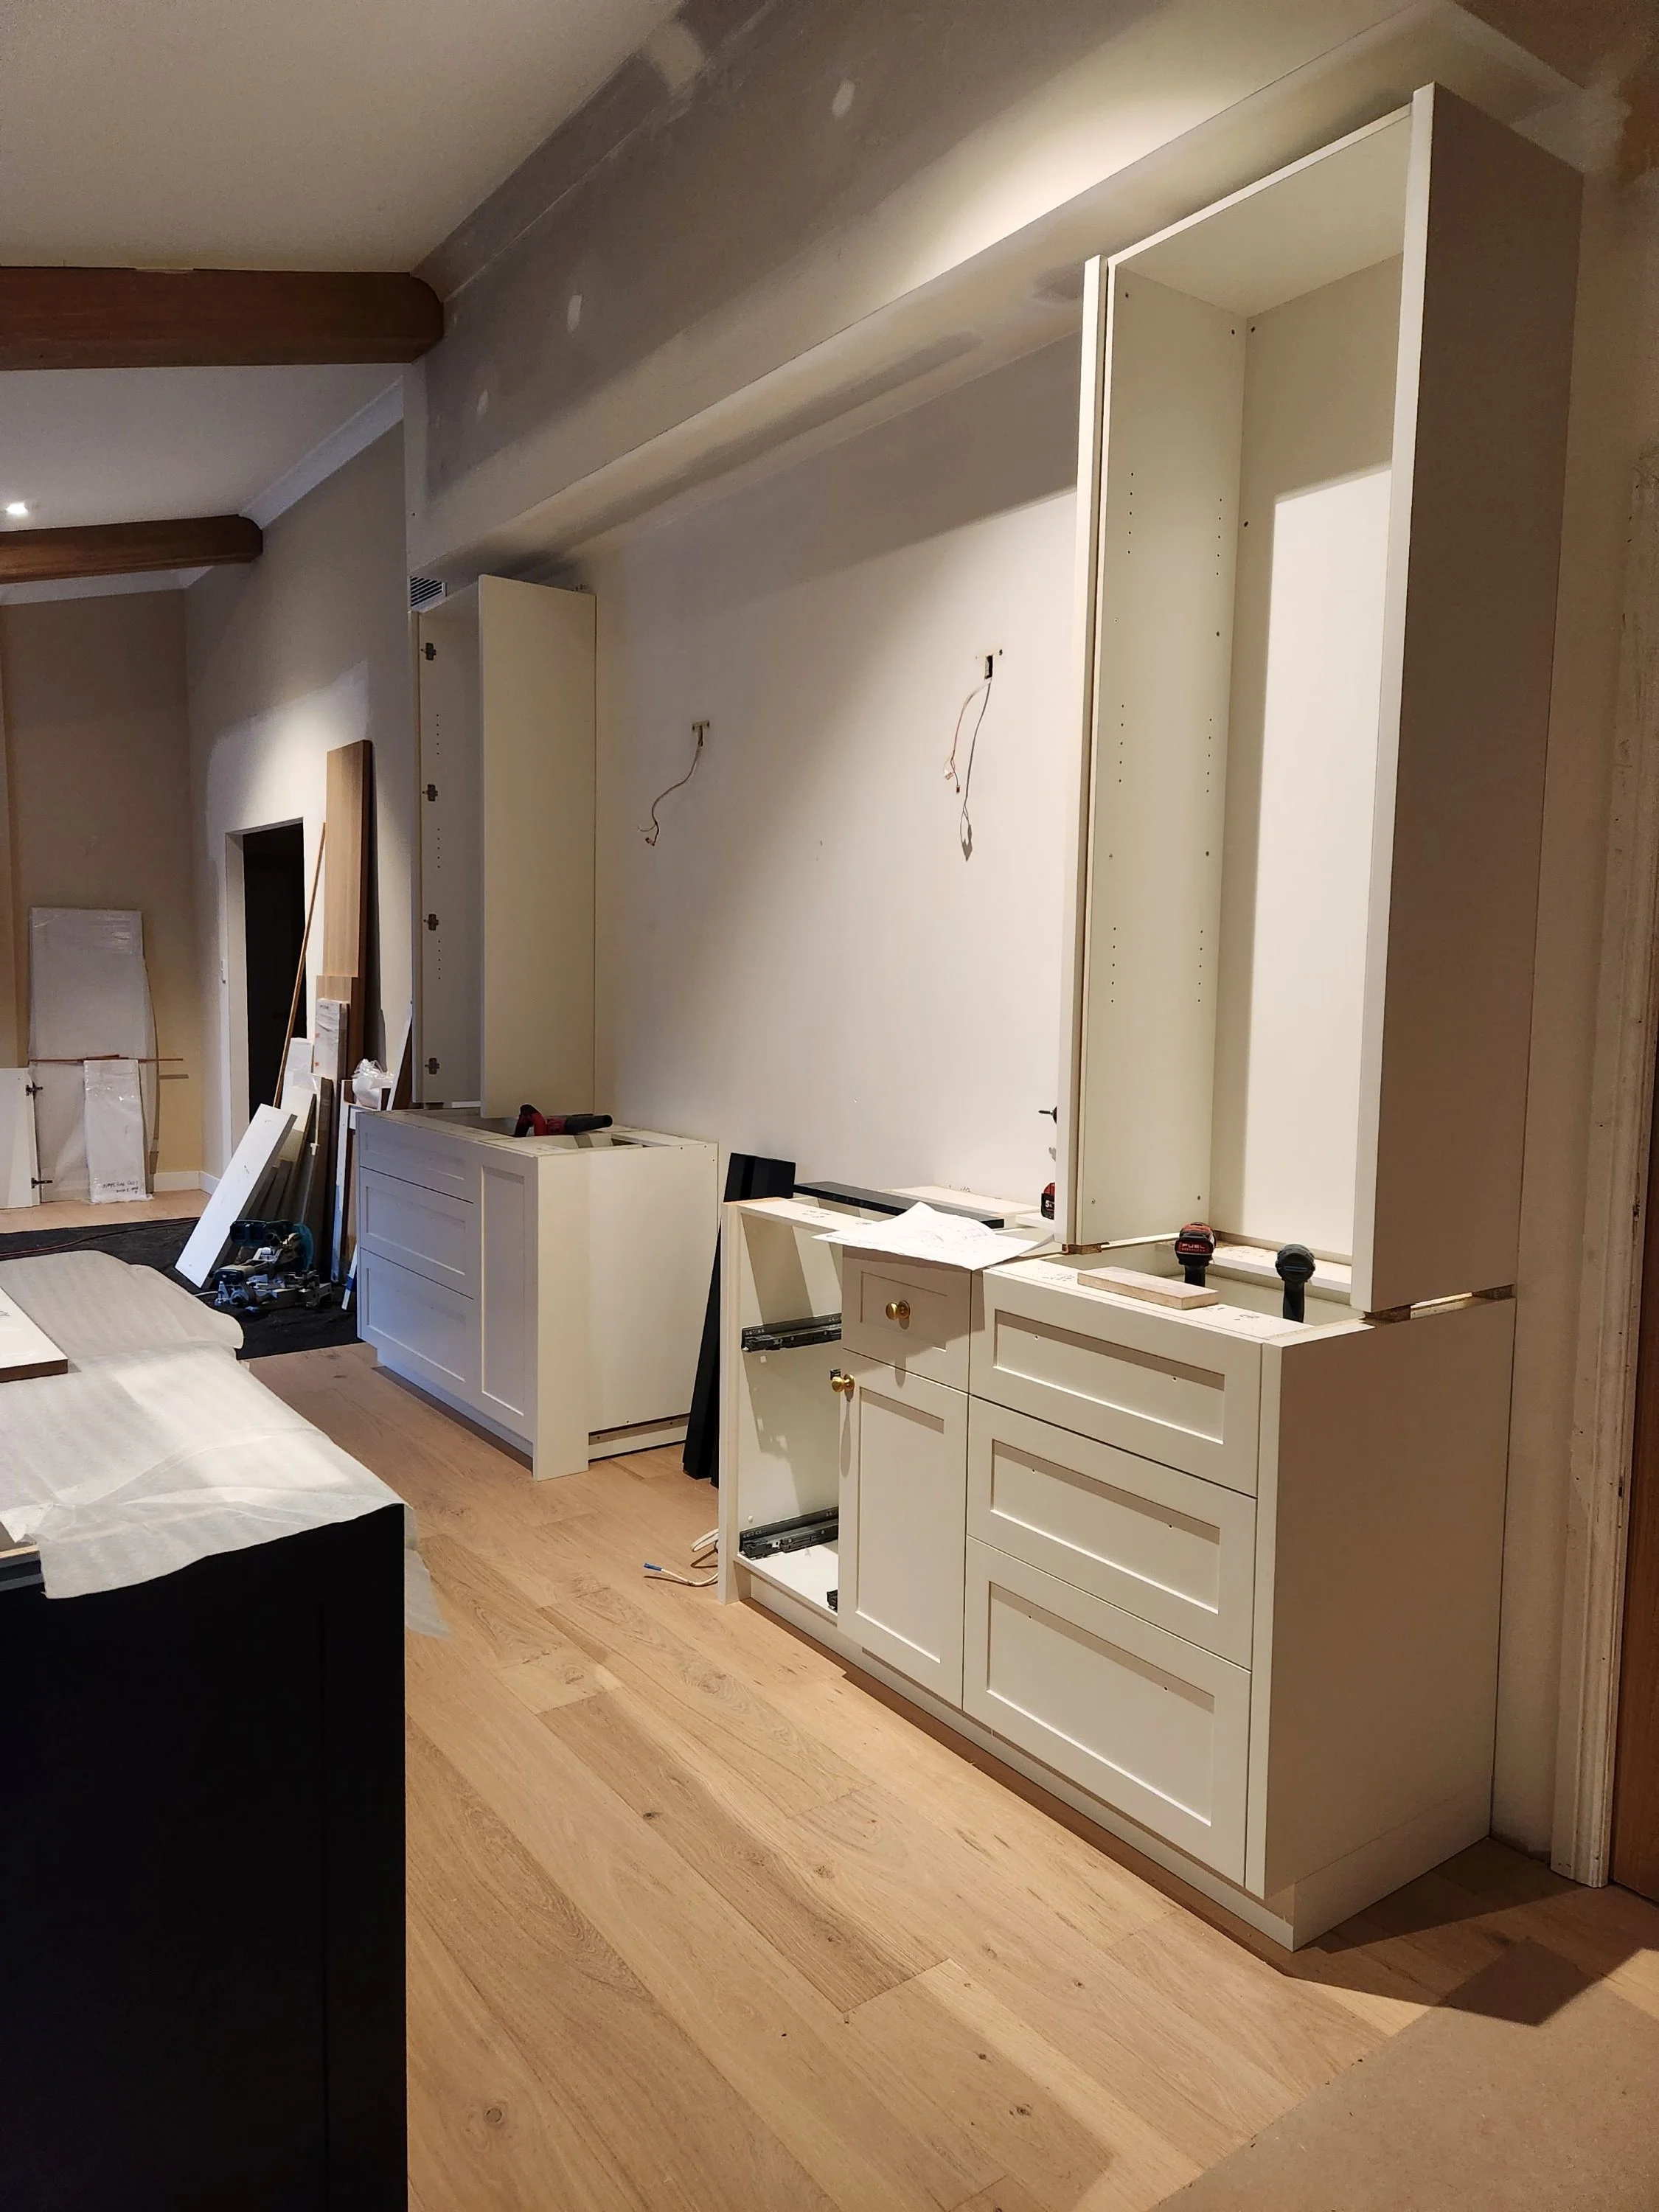
One thing many homeowners don’t realise is that some flooring products should not run underneath cabinetry. Many floating laminate and hybrid flooring manufacturers won’t warranty their products if cabinetry is installed on top due to movement and swelling risks over time.
This is also a stage where timelines can catch people off guard.
Typically, your joiner will complete a final site measure around 6–8 weeks before installation so the cabinetry can move into manufacture. Then, once the cabinetry is installed onsite, the stone benchtops are measured for fabrication.
Depending on your supplier and stonemason availability, stone fabrication and installation can take anywhere from 1 to 4 weeks.
10. Fit off and testing: the plumbing, electrical, and HVAC trades return to connect and test all the fixtures and fittings that were roughed in earlier in the project. Taps, sinks, lighting, powerpoints/GPO’s, appliances, air conditioning units, fireplaces, smoke alarms, and other services are all installed and tested to ensure everything functions correctly.
For many homeowners, this is the point where the project suddenly starts feeling very real.
11. Final trims: any remaining architraves, skirtings, or cornices that couldn’t be installed earlier are completed at this stage. These are often the trims that need to terminate neatly against cabinetry or other finished elements.
It’s a smaller stage in the overall process, but one that makes a surprisingly big difference to how resolved and polished the home feels.
12. Final paint touch up: once the final trims are installed, the painters usually return for touch-ups and finishing coats.
This stage often includes painting newly installed skirtings and architraves, patching minor marks, fixing small imperfections, and generally refining the final finish throughout the home.
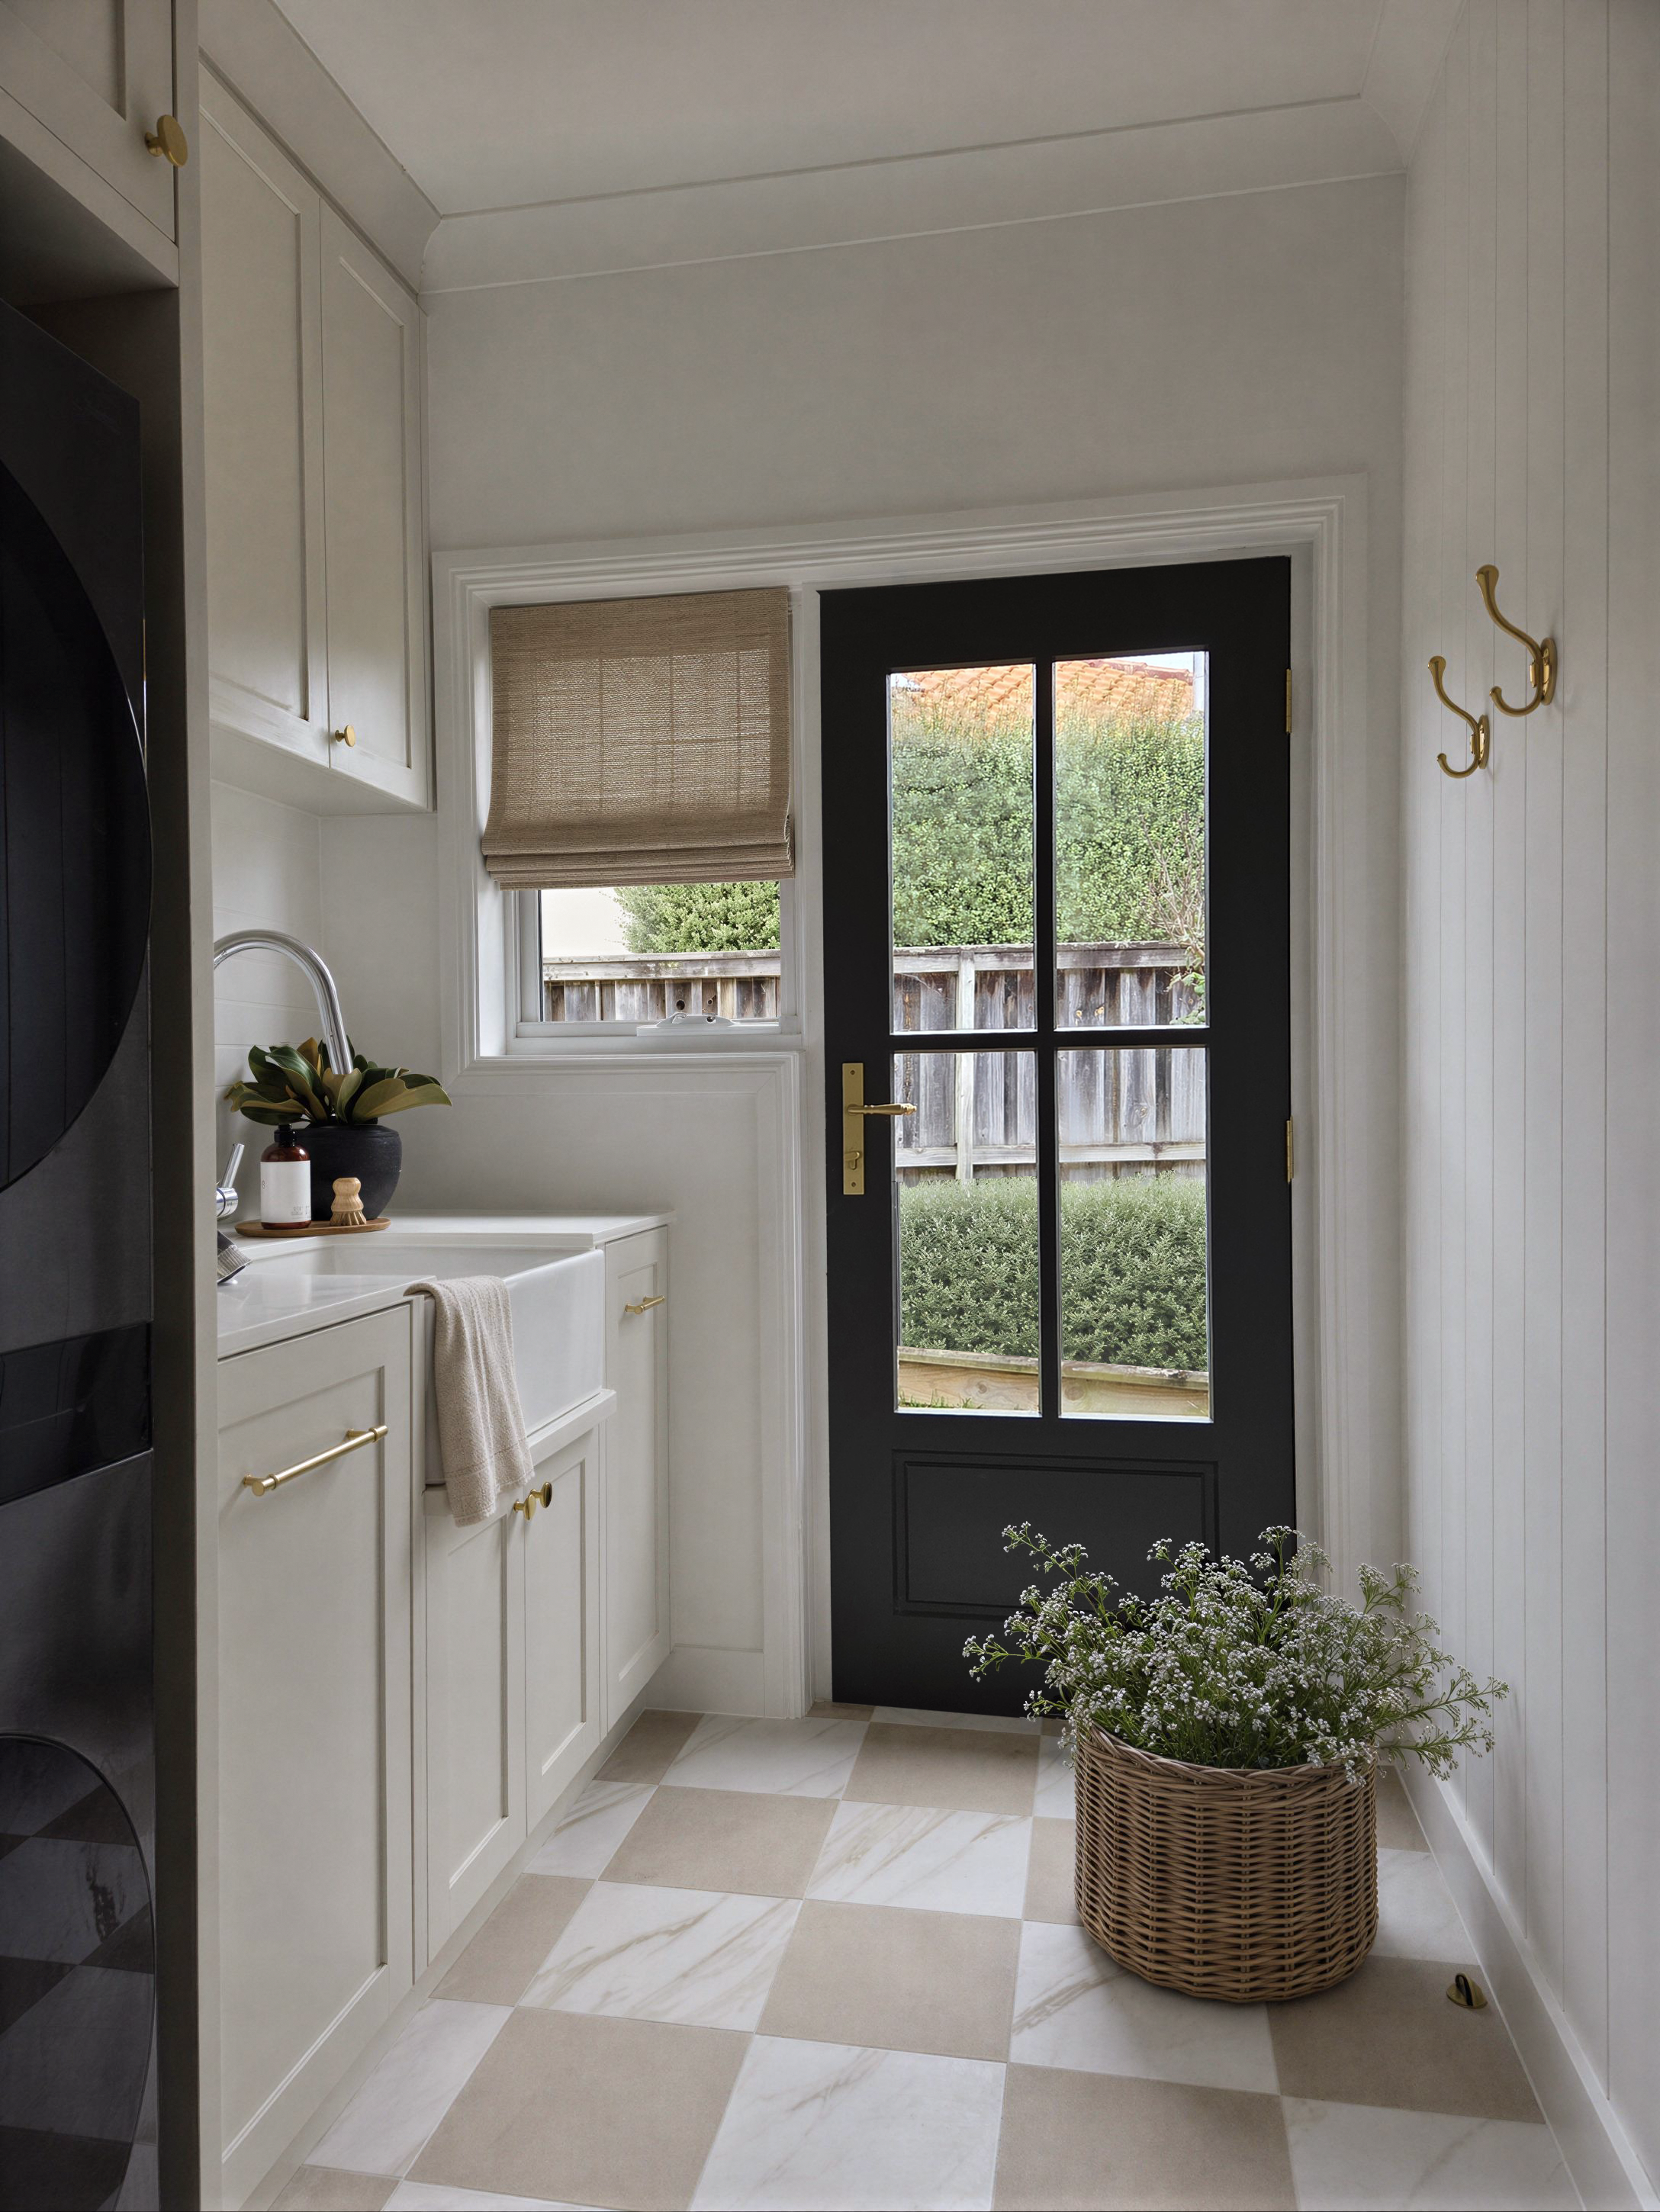
13. Bathroom Accessories & Final Fixtures: The final accessories are installed toward the very end of the project. Mirrors, towel rails, robe hooks, shower screens, toilet roll holders, pot rails and the like can now be fitted ready for use.
14. Full site clean and defects inspection: before handover, the site should undergo a full professional clean along with a detailed defects inspection.
Time to go through with a fine-tooth comb and get any last outstanding items rectified before the trades disappear never to be seen again. I don’t mean disrespect by saying that, but our trades are incredibly busy so once a job is completed it’s often very hard to get them to come back in a timely manner to address any issues. Due to this, I would always recommend not moving in, and withholding the final payment, till all outstanding items and defects have been corrected.
15. Handover walk through: this is the moment you get to see it all come together. The final stage is the handover walk-through with the client.
This is where the builder and design team walks through the completed home with the client, explains how appliances and systems operate, discusses any maintenance requirements, and addresses any final questions.
And after months of planning, decisions, dust and answering questions about grout colours, you can finally put the kettle on without first having to find it beneath a drop sheet. It’s a time to celebrate reaching the finish line with those who were involved and who work tirelessly to bring it all to life.
A note on Exterior Works: Paving, landscaping, new or resurfaced driveways, exterior painting and similar works are typically left until the end of a renovation. This helps minimise access disruptions and avoids freshly finished surfaces being damaged by trades, machinery and material deliveries.
Of course, the sequencing isn’t always quite so clear-cut. If the painters are already on site completing the interiors, it may make sense for them to stay and finish the exterior at the same time. Just be strategic about how these works are scheduled. You don’t want the interior renovation grinding to a halt for a week or two because the driveway, footpaths or new porch have been poured and need time to cure before anyone can access the site again.
Plan Early and Ask Questions
Understanding the general order of a renovation makes it much easier to follow the construction programme, prepare for upcoming decisions and have informed conversations with your builder and trades. It also highlights just how many decisions must be made well before an item appears on site.
A tap may not be installed until fit-off, but its specification can influence the plumbing rough-in months earlier. A wall-mounted television may be one of the final items installed, but the power, data and structural support behind it need to be planned before the walls are enclosed.
This is why thorough design and documentation at the beginning of a project are so important. The more that can be resolved before construction begins, the fewer expensive surprises, rushed decisions and awkward compromises you are likely to face along the way.
You do not need to know how to perform every trade yourself, nor should you be expected to. But understanding what should generally happen, when it should happen and what information is needed at each stage gives you a much stronger position from which to manage your renovation.
Because while a little knowledge can be dangerous, going into a renovation with no knowledge at all can be considerably more expensive.
Further questions, hard-learnt wisdom and “you couldn’t make this up” building stories are all welcome below - we all need a good laugh (or cry) 👇 As are those renovation questions you’ve searched high and low for but still haven’t found a straight answer to. I may just cover yours next…
Until next time,