
42 Ways to Stretch Your Renovation Budget (Without Sacrificing Style)
There’s no denying it - the cost of living feels high everywhere right now. Groceries are expensive, petrol is out of control, interest rates have people clutching their coffee cups a little tighter, and even a quick trip to Bunnings ends in a $300 receipt and yet somehow you forgot the one thing you actually went in for.
One thing I see time and time again is people putting off projects because the timing never feels “right”. They’re turning on the bathroom faucet with a spanner. The kitchen drawers barely open. The lack of storage is driving the entire family quietly insane. And yet, they put up with it, thinking that a time will come where they are ‘ready’.
And while renovating can absolutely feel overwhelming (and expensive), living in a home that no longer supports your lifestyle can slowly start to weigh on you too. A dysfunctional environment affects your stress levels, routines, relationships, even your willingness to invite people over.
Sometimes, despite the timing not being perfect, you simply reach a point where you need to bite the bullet, roll up your sleeves, and just get on with it - whatever that looks like for you. That doesn’t mean spending recklessly or trying to create a Pinterest-perfect home overnight. It means being strategic. Knowing where to invest, where to simplify, what’s worth DIY-ing, and what decisions will actually make the biggest impact long term.
So, if you’ve been wanting to improve your home but the budget side of things has felt daunting, these 42 ideas are here to give you confidence, practical guidance, and reassurance that creating a beautiful home doesn’t always require an unlimited budget.
A thoughtful renovation is rarely about spending the most money - it’s about spending wisely.
Plan First, Spend Smart
1. Set a clear budget and include a small buffer for surprises.
Typically, the contingency amount is at least 10-20% of your overall budget. Hopefully you won’t need to tap into it but from experience there’s always something that’s discovered, especially during demolition where the walls are opened up. Possibly mould, termite damage, a service pipe that needs to be relocated, additional floor prep required as the slab is in poor condition. To know you have accounted for this overage if needed is a comfort.
2. Take the time to plan properly - last minute changes are costly.
This includes space planning and specifications, as changes to specifications typically have a significant knock-on effect.
3. Get at least 2-3 quotes before locking anyone in.
This can include builders, subcontractors and suppliers. Yes, this is a time-consuming task, but it ensures you get the best bang for your buck. It also highlights any red flags – e.g.: Why is that builder so cheap? Are you comparing like for like? Have they substituted materials or finishes? Have they included all necessary trades in their quote? Without this comparison, it leaves the door open for unexpected variations later down the track.
4. Tackle the renovation in stages to spread out costs.
A staged approach helps make the project feel more financially manageable. Keeping more money in the bank for longer can also help reduce the impact of interest repayments during the renovation process. This approach works particularly well when you don’t have the time, budget, or capacity to tackle everything on your wish list at once, allowing you to focus on one space at a time and prioritise what will make the biggest difference to your everyday life first.
That said, staged renovations aren’t always the cheapest option overall. Depending on the scale and scope of the project, completing all works at once can sometimes be more cost effective, as trades will typically charge call-out fees each time they return to site. There’s also the worry that once stage 1 is completed, you’re absolutely over it and therefore never make it to stage 2!
5. Focus on high-impact areas first, like the kitchen or bathroom.
These areas are considered the most important to the majority of home buyers and home owners so prioritising these areas and getting them right is key. They are also the rooms within a house that cost the most money to renovate so it’s best to understand what you are in for before moving onto adjacent rooms like bedrooms or living rooms where there are smart ways to keep costs low.
6. Keep the existing layout where possible (especially plumbing and electrical).
7. Make sure your approvals are done right the first time.
Adjustments to DA or CDC packages can add up very quickly, blowing a large portion of your budget before you’ve even started onsite.
8. Don’t be afraid to ask for discounts with suppliers.
You’d be surprised how often it helps. In saying that, this is one of the main benefits to engaging the services of an Interior Designer, Architect or Stylist. We are able to get much better trade discounts across products and services.
9. Book trades in their quieter seasons for better availability and rates.
The construction industry in Australia is always busy, but you often hear that the winter months are quieter. Unfortunately, winter can come with undesirable weather though which can create delays. Delays = money
10. Use a comprehensive renovation spreadsheet to track all expenses.
When I first became an Interior designer over a decade ago and started to work on my own projects as well as client projects, I found it extremely hard to find a thorough spreadsheet to keep on top of all the costs. It takes going through the process many times with varying scope of works to fully understand the hundreds of specifications and trades involved. The resources that were available for download were very generic which meant that unforeseen costs crept up quickly.
Due to this, I developed my own tool which I have worked on, modified, and finessed over the years. I have recently made this available to purchase through the Oak & Olive website if you wish to set realistic cost expectations, track expenses, and allocate appropriate contingency funds to prevent blowing the budget. Click here to download a copy for your own project.
11. Keep external walls and the roofline as-is to avoid major structural costs.
12. Book in a building and pest inspection for the house.
Ideally you have done this prior to purchasing your current home, however if you haven’t had one done by a professional it is recommended you do so before renovating. The inspections can uncover major issues which is best to understand upfront as the costs involved to rectify these problems can be significant. This will then dictate how much is left over after the remedial works to put towards the rest of your renovation.
13. Engage an Interior Designer, Architect, Stylist, Landscape Designer depending on your project needs.
What I often hear is “why would I pay for a designer?”. I could spend all day going over the pros of engaging a professional, but the main reason is because this is what we do. A qualified and experienced designer understands the process, who and what is required, the costs, the magnitude of suppliers and products available, can visualise what will look and work best for a space/house, understands the local building codes/standards/regulations and will keep projects on track. Not to mention you can tap into our amazing trade discounts. Are there bad designers out there? Like any job of course there are, which is why you have to do your research. Shortlist a few that you like and personally chat to them, or book in a consult, to see if you get along and they appear to be someone who will listen to your needs.
At the end of the day, you may pay thousands of dollars for a designer (depending on scope of course) but you’ll save a big portion of that on trade discounts, time/holding costs, and reducing mistakes and variations. Getting it wrong can cost you far more.
Do What You Can Yourself – Roll Up Your Sleeves
14. DIY the demolition (carefully and safely).
Ensure nothing you undertake yourself is required to be carried out by a qualified / certified trade. Taking on such tasks can render your renovation ‘non-compliant’ when it comes to getting your OC certificate. When it comes to demolition, work smarter not harder – see what the recommended tools are for work you are taking on and see where you can hire them (Bunnings, Kennards etc).

15. Painting yourself can save thousands in labour.
Keep in mind though that what a professional painter or painting crew can accomplish in a few days will take you weeks (possibly months depending on your life) to complete to the same level of quality. Time = money, so use your time wisely as taking on too much yourself will cost you in the long run. It can delay other trades coming back to complete their works and it can also mean another few months’ rent at your current accommodation.
16. Try DIY landscaping where you can.
Simple updates like fresh mulch, new plants, edging, or laying new grass can dramatically improve the look and feel of your home without a huge investment. A little effort outdoors can go a long way in making your property feel more polished, welcoming, and well cared for.
17. Source your own fittings and fixtures to avoid builder markups.
Some builders will not allow this for various reasons so make sure you have this discussion up front if you wish to take this on. When you take on procuring fittings and fixtures, you take on the responsibility of making them available onsite when the trades require them. If they are not delivered to site when needed, you will incur delay or variation costs.
It’s also worth noting that supplying your own products can sometimes affect warranties or limit a builder’s responsibility for defects, compatibility issues, or faulty items, as they may not be willing to warranty products they didn’t source directly.
18. Flat-pack cabinetry can look great when planned and assembled well.
Whilst I wouldn’t always recommend this for large or complex kitchens, you can definitely get away with flat pack options for spaces such as laundry’s, mud rooms and wardrobes. There are ways to make flat pack cabinetry feel ‘custom’ such as purchasing raw finish doors and painting them yourself, trimming them out to appear ‘built-in’, and/or installing quality handles or knobs.
19. Watch tutorials for small tasks - the internet is your best DIY friend.
Over the years we have DIY’d many elements within our own projects such as wood mantles, VJ wall panelling, wainscotting and mud room bench seats. I have been lucky in that my dad has many carpentry skills and has taught me from a young age, but YouTube and Instagram reels have come in super handy over the years!
Save on Materials & Finishes
20. Keep an eye on sales and clearance events for tiles, tapware, and flooring.
If the stars align, procure when Black Friday and Cyber Monday sales hit towards the back end of the year. Many of the tile and cabinetry hardware companies have 20-30% off sales. When you are buying 50 handles that are typically $40 each, that can save you $400-$600. Subscribe to the suppliers you love so that you are alerted by email or text when sales are about to occur.
21. Use off the shelf, standard trims.
There are some beautiful skirting and architrave profiles available these days through suppliers like Intrim, however they can quickly add up when large quantities are required. They do become cheaper the more you order, but it will never be as cost affective as purchasing a standard profile from a local hardware store. E.g.: Woodhouse Edgeline profiles from Bunnings. Your options will be more limited, but it can save you a considerable amount of money.
22. Stick to standard sizes for doors, windows, and cabinetry.
Anything custom will result in much higher costs and often come with longer lead times due to manufacturing requirements.
23. Choose laminate/hybrid/vinyl or engineered finishes over solid timber or stone.
Just be aware that depending on the supplier and range you choose from, the alternatives can end up costing as much as the real thing. Where you often save money is the labour costs involved with installation – particularly with glued flooring vs floating flooring as the amount of preparation required to the slab or subfloor is far more involved with glued floor finishes. All options have their pros and cons though so make sure you do your research or ask your interior designer what each specification entails so you prepare yourself for what the finished outcome will look like. We don’t want any surprises!
24. Ask stone suppliers about offcuts or remnants for vanities and benchtops.
This requires an element of luck as you have to find the right stone and the right size to suit your needs, however sometimes it forces you to consider something unusual which pays off in the long run. Particularly for areas such as a bar or guest powder room where it’s not uncommon to go with a bolder stone.
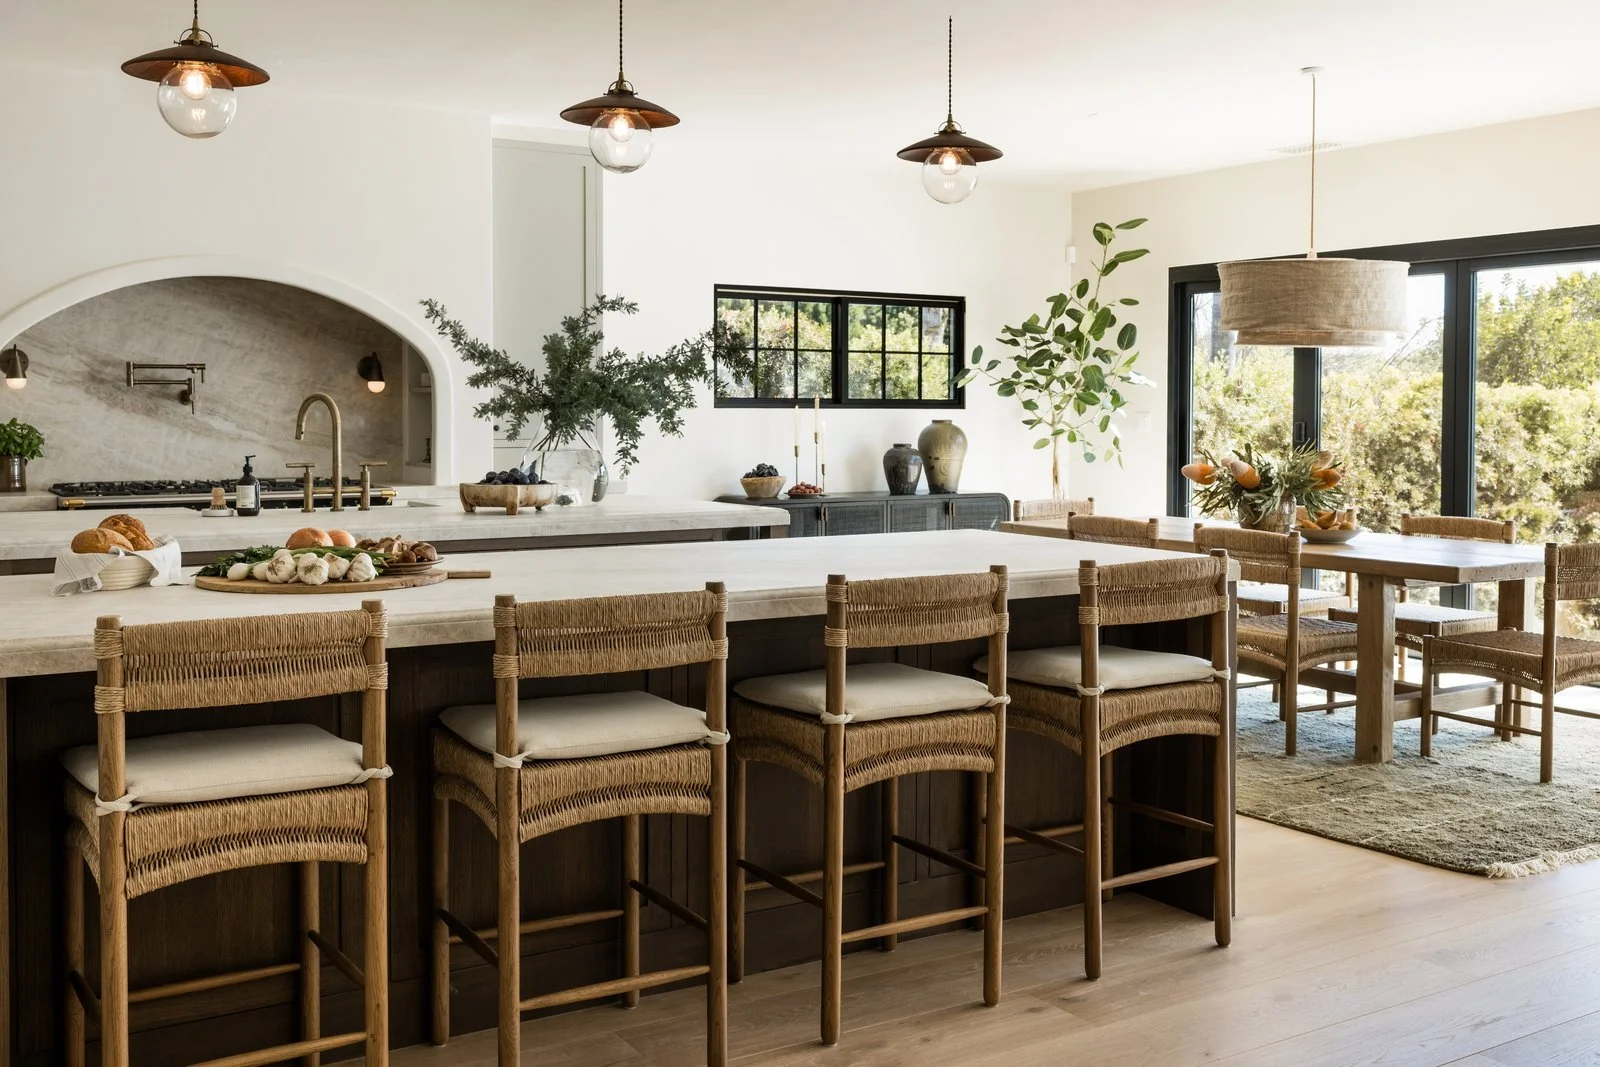
25. Open shelving can look beautiful and costs less than enclosed upper cabinetry.
The same principle applies to cupboards versus drawers. Drawers generally cost more due to the additional hardware and more complex soft-close runner mechanisms required. In some areas, opting for standard cupboards instead of multiple drawers can be a simple way to help keep cabinetry costs under control.
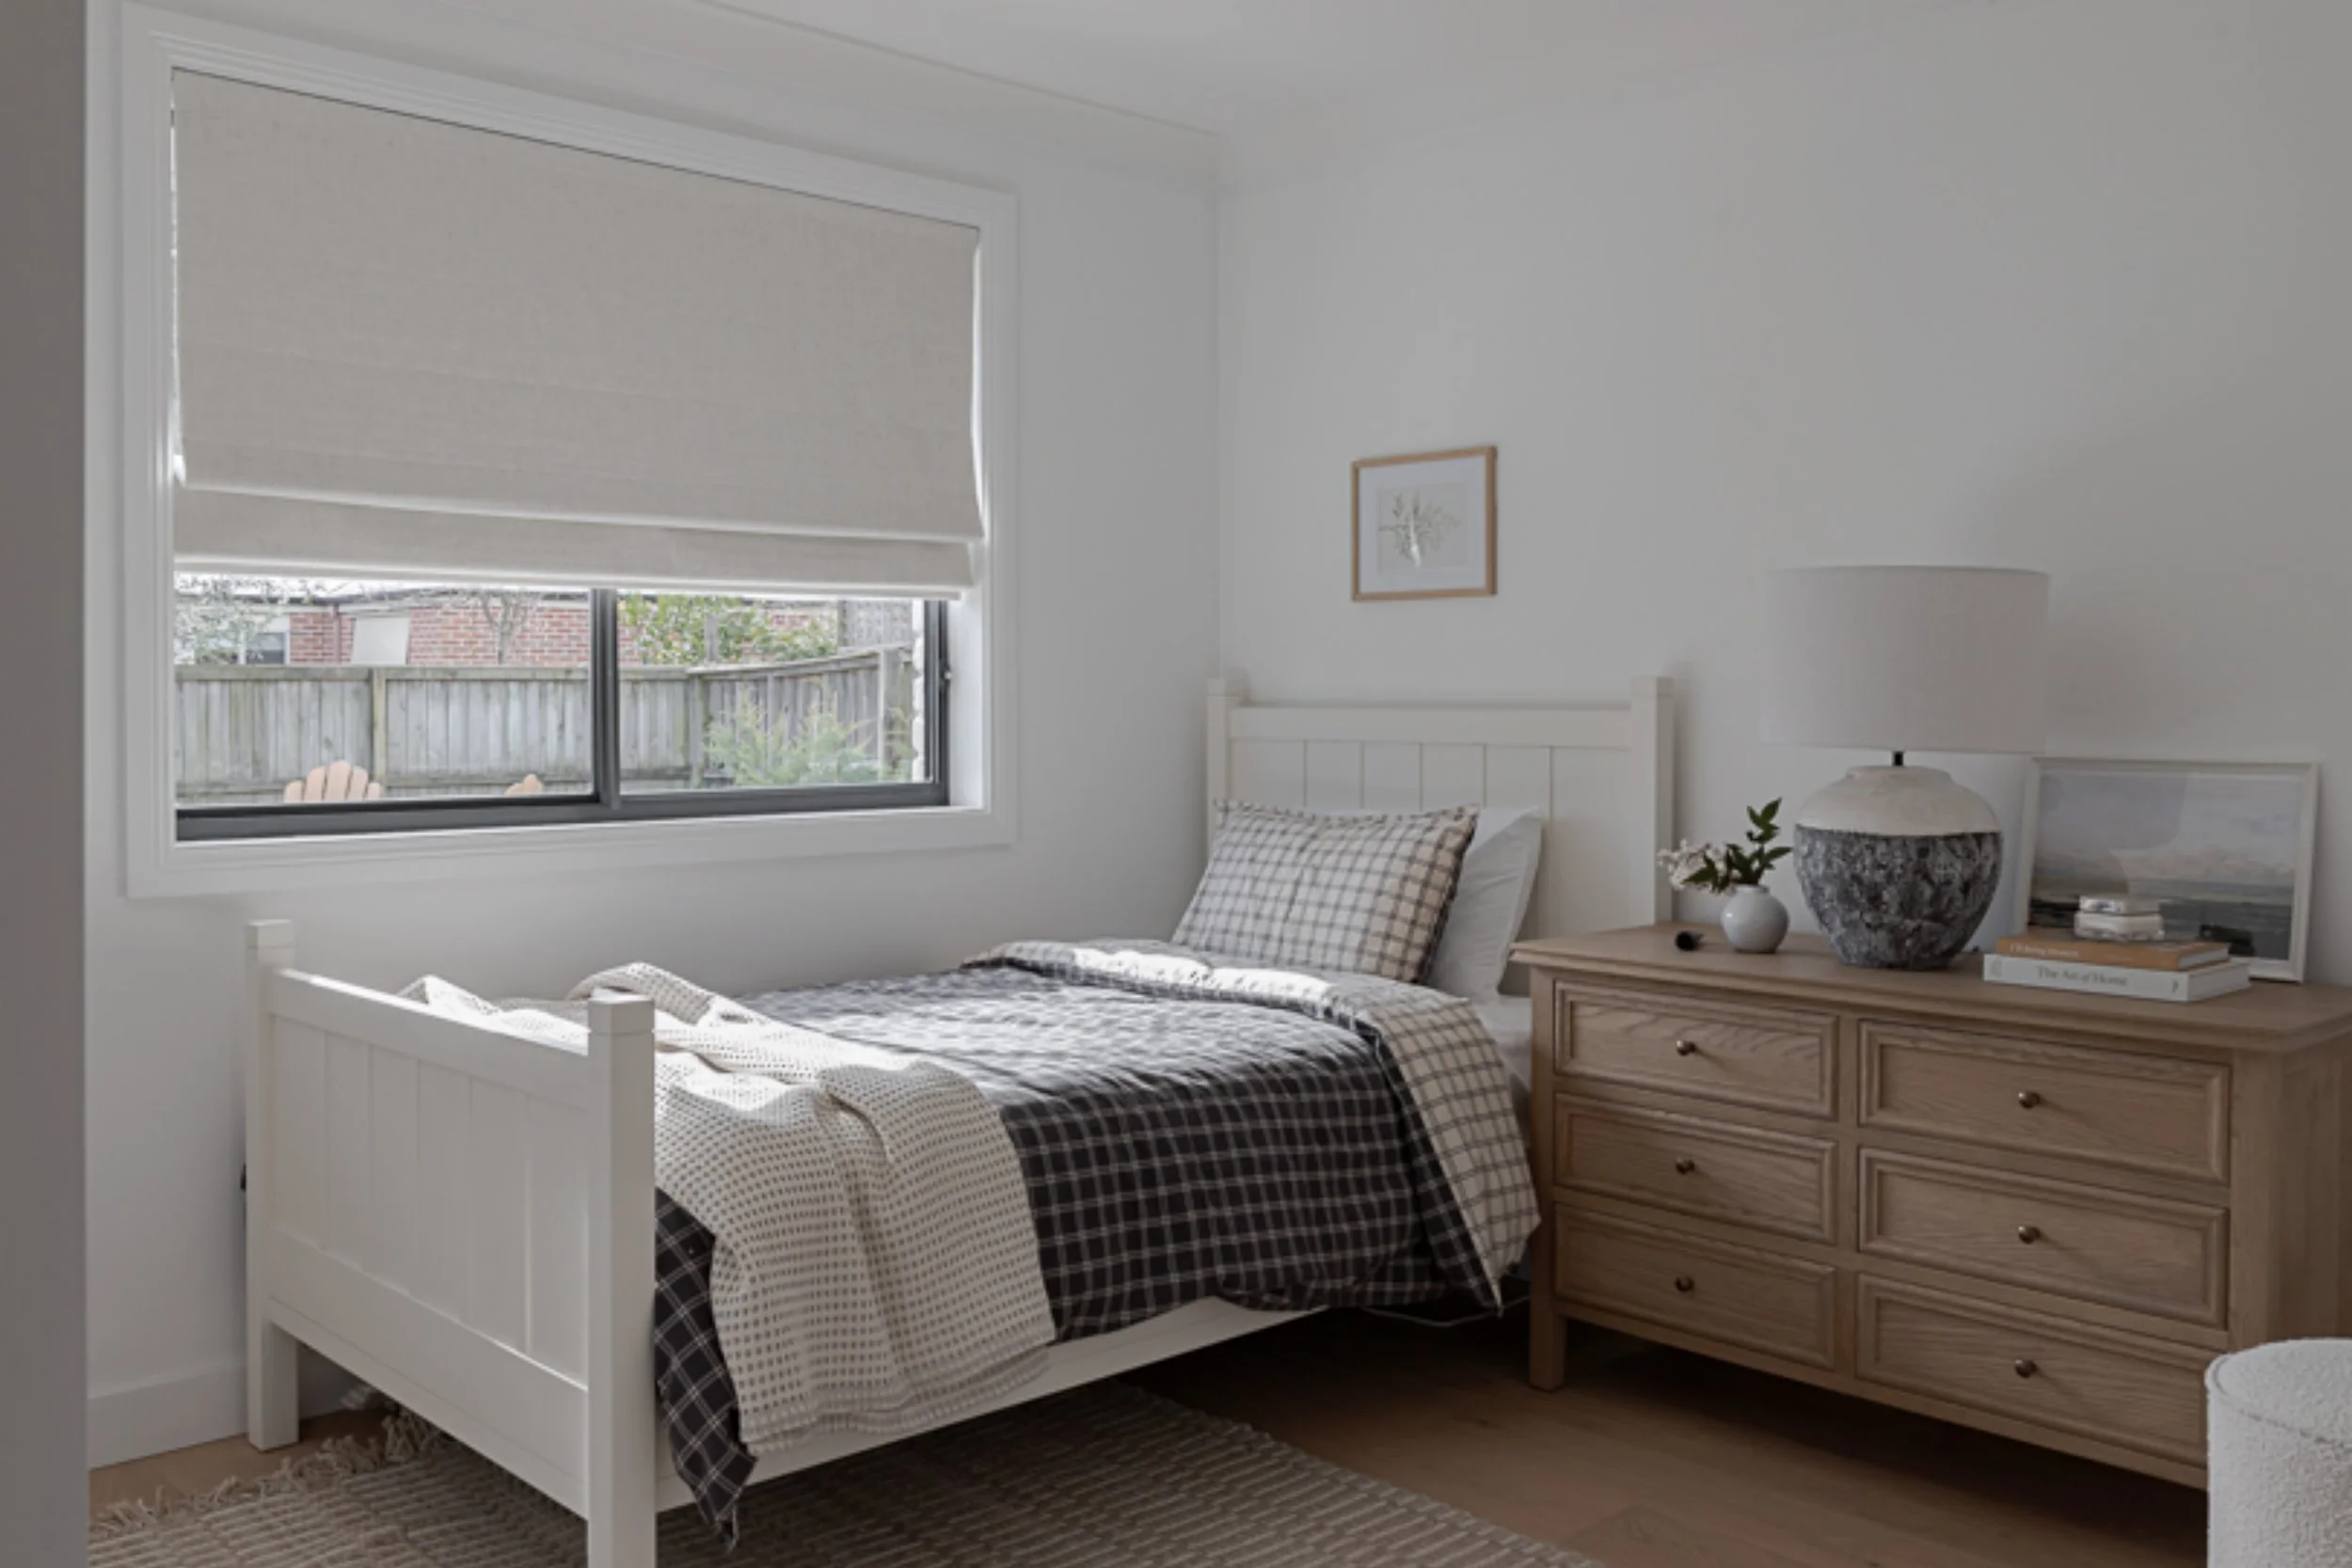
we cut this dresser down to create a wider bedside table
26. Refinish or repaint existing pieces instead of replacing them.
This is a point that I live by. I can’t tell you the amount of furniture pieces I have painted, cut down for an alternate use, or simply added new handles or knobs to. I’d also apply this point to op shop hunting. If you see a furniture piece that is perfect but it’s the wrong colour or the fabric is damaged or not quite your style – don’t be put off by that. It can always be painted or reupholstered. Again, this is an opportunity to end up with a one-off piece that is a talking point with visitors.
27. Reduce scope of tiling.
Gone are the days where tiling the whole room was expected. Many homeowners and designers are opting for only tiling the wet areas (shower & bath zones) in order to soften the overall look of a bathroom by keeping the remaining walls painted or lined with feature boards such as v-groove or bead board. This also creates an opportunity to introduce more homely styling items, like wall hung art, which reduces that often sterile and commercial like feel to a fully tiled bathroom.
28. Keep tiling patterns simple
Tilers can charge you 2-3x the standard rate for the labour involved in complex tile patterns such as diamond checkerboards, individual mosaic patterns or tessellated tiles, and crazy paving/tiles. If you stick with standard installation patterns like stack bond and stretcher bond, it will help keep costs down.
29. Ask your designer (that’s me) about more budget-friendly alternatives.
There are often clever ways to achieve a very similar look and feel without the premium price tag. From alternative materials and finishes to adjusting layouts, specifications, or sourcing options, small changes can sometimes result in big savings without significantly compromising the overall aesthetic or functionality of your home.
30. Keep the number of suppliers to a minimum
This helps to reduce shipping and delivery costs as you are only paying once for multiple items to be delivered to site. It also gives you some buying power in that you can often get a discount when packaging items together from one retailer.
31. Jump onto online marketplaces.
When in a pinch financially, you can source at least 75% of required materials, finishes, fittings and fixtures from online marketplaces like Facebook and Gumtree. Items that I have purchased over the years include tiles, basins, a marble fireplace mantle (I’ve never been so stressed in my life transporting this in a rickety old Ute from the Eastern Suburbs to the Southern Highlands, but it saved us THOUSANDS of dollars), lights, tapware, furniture and even plants for landscaping. There are always people who have excess items left over from previous projects or have changed their minds halfway through and are selling off their previous specifications.
Tip: set up alerts so you are notified as soon as an ideal item hits the marketplace.
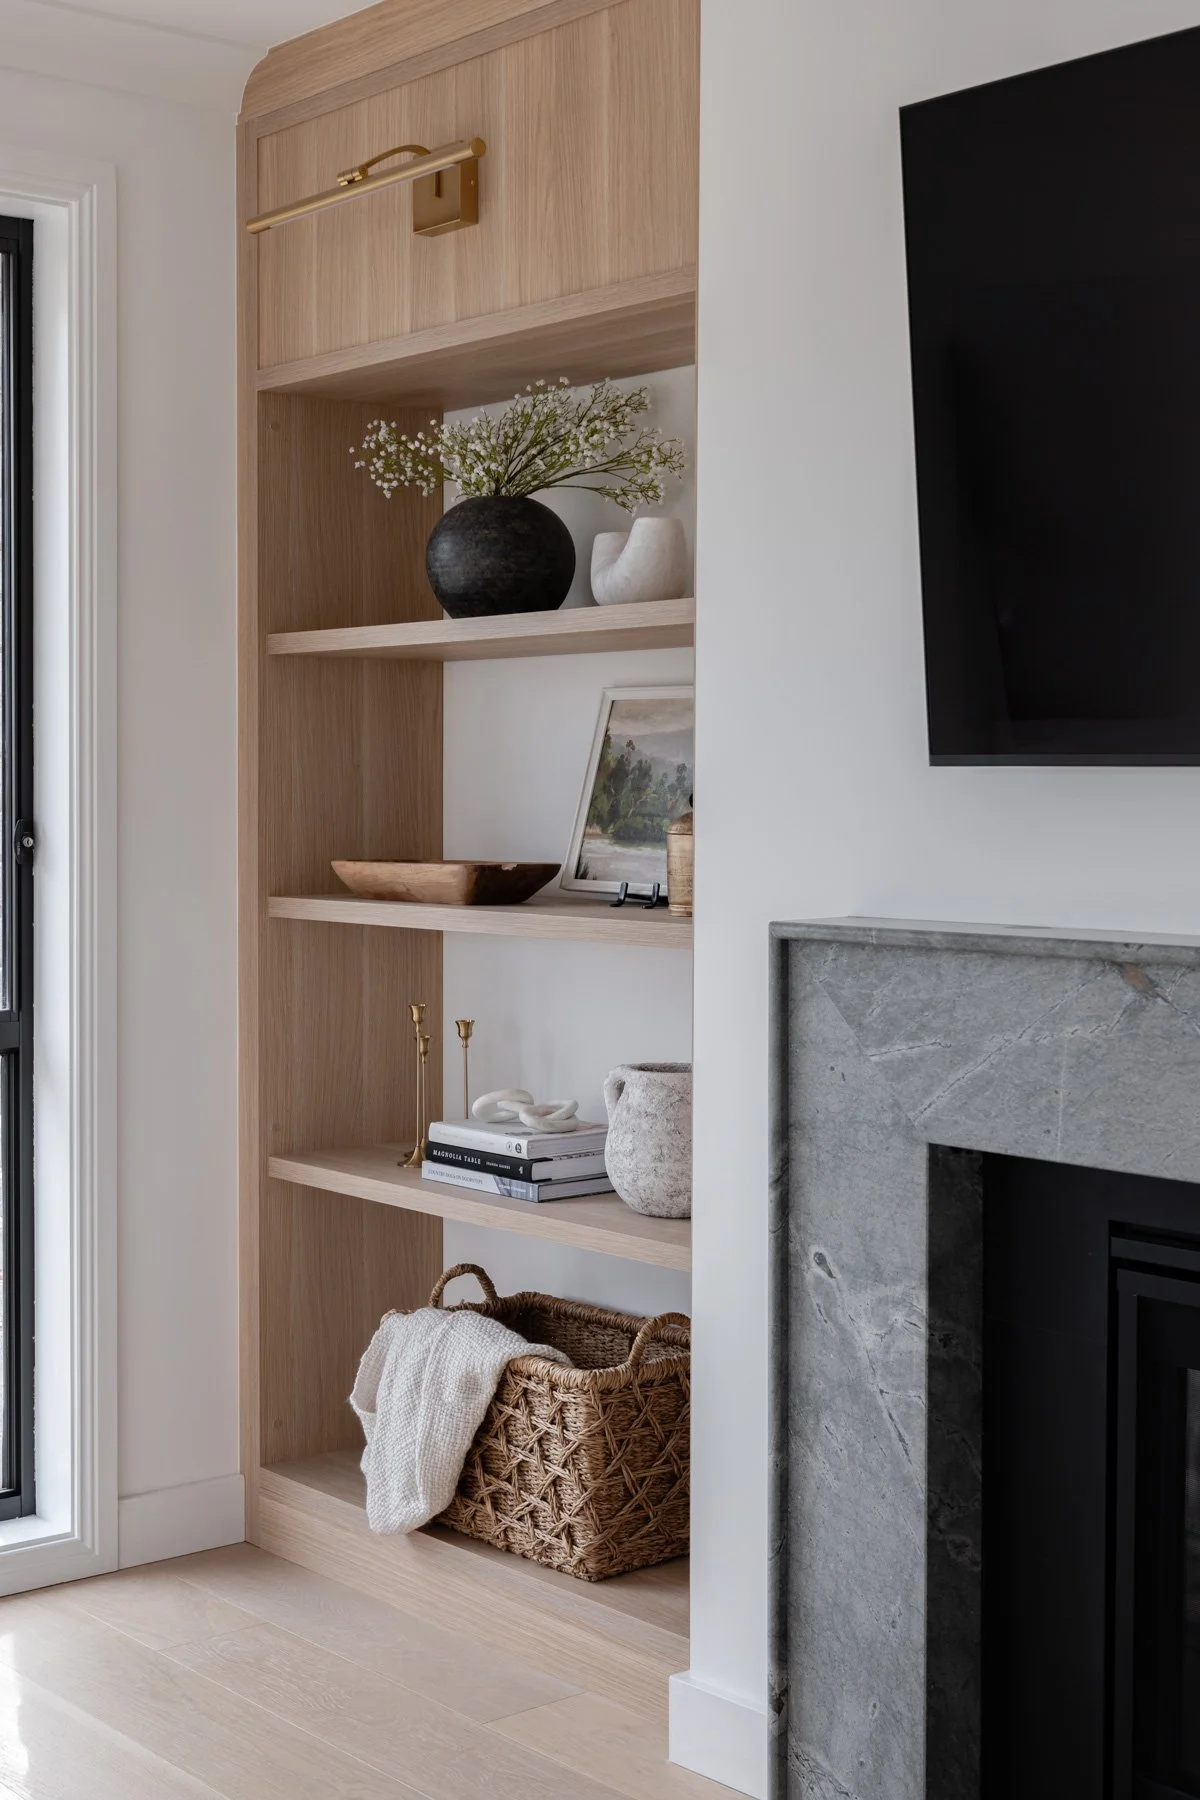
the marble fireplace that added 5 years to my life
32. Mix high and low pieces throughout your home - splurge where it counts and save where you can.
This is something I do on almost every project. I’ll often pair a few beautiful designer or investment pieces with more affordable finds from places like Target or Victoria's Basement. When thoughtfully layered together, the pieces balance each other out beautifully, and the more budget-friendly items often end up looking far more elevated and expensive than they really are.
33. Start collecting immediately.
I say this for multiple reasons:
• When you see something you love, buy it, because when the time comes to purchase it, it will no longer be available. You’ll always be devastated by that missed opportunity and you may never be content with the alternative you’ve had to settle on.
• In my opinion, the best interiors are curated over time. Go into op shops and antique stores every chance you get. I’ve collected so many unusual nick knacks over the years that span different styles and design eras. You can’t pick those special pieces up in an average store. Your home will be truly unique.
34. Purchase and install your own window furnishings
Order custom blinds, curtains or shutters online for your home. Rest assured, you can order fabric samples to check the colour and quality prior to ordering, to ensure you are happy with the final result. There are also additional add-ons you can specify such as blockout linings and motorised mechanisms. These online manufacturers are generally cheaper than your standard brick and mortar window furnishings store and yet you are still getting a ‘custom’ product.
Tip: Make sure you follow their guidelines when measuring your windows and doors to ensure you are providing them with the right dimensions.
Think Long-Term with Utilities
35. Add ceiling fans to reduce the use of air conditioning.
36. Take advantage of solar rebates if available.
37. Insulate while the walls are open - it’s cheaper now than later.
38. Choose water-saving fixtures (WELS rating) and good energy ratings on appliances to reduce running costs.
39. Consider future proofing your house where you can.
Eg: I always recommend installing additional USB-C GPO’s throughout the house whilst the electrician is onsite working on your project. Technology is the future so see what the immerging trends are and consider how you can integrate that into your design to avoid future costs.
Work Smarter with Trades
40. Use local trades and suppliers to save on travel and delivery fees.
41. Buy materials in bulk when possible.
42. Negotiate payment terms where appropriate, as some trades may offer discounts for early payment or upfront deposits.
That said, it’s important to approach these conversations fairly and realistically. Builders and trades often need funds upfront to procure materials and prepare for upcoming stages of work, so it’s not reasonable to expect them to carry the financial burden simply to help reduce your costs. They’re running businesses, managing cash flow, and supporting their own teams and families too. A respectful, collaborative approach always leads to a better working relationship throughout your renovation.
And one bonus idea for the road…
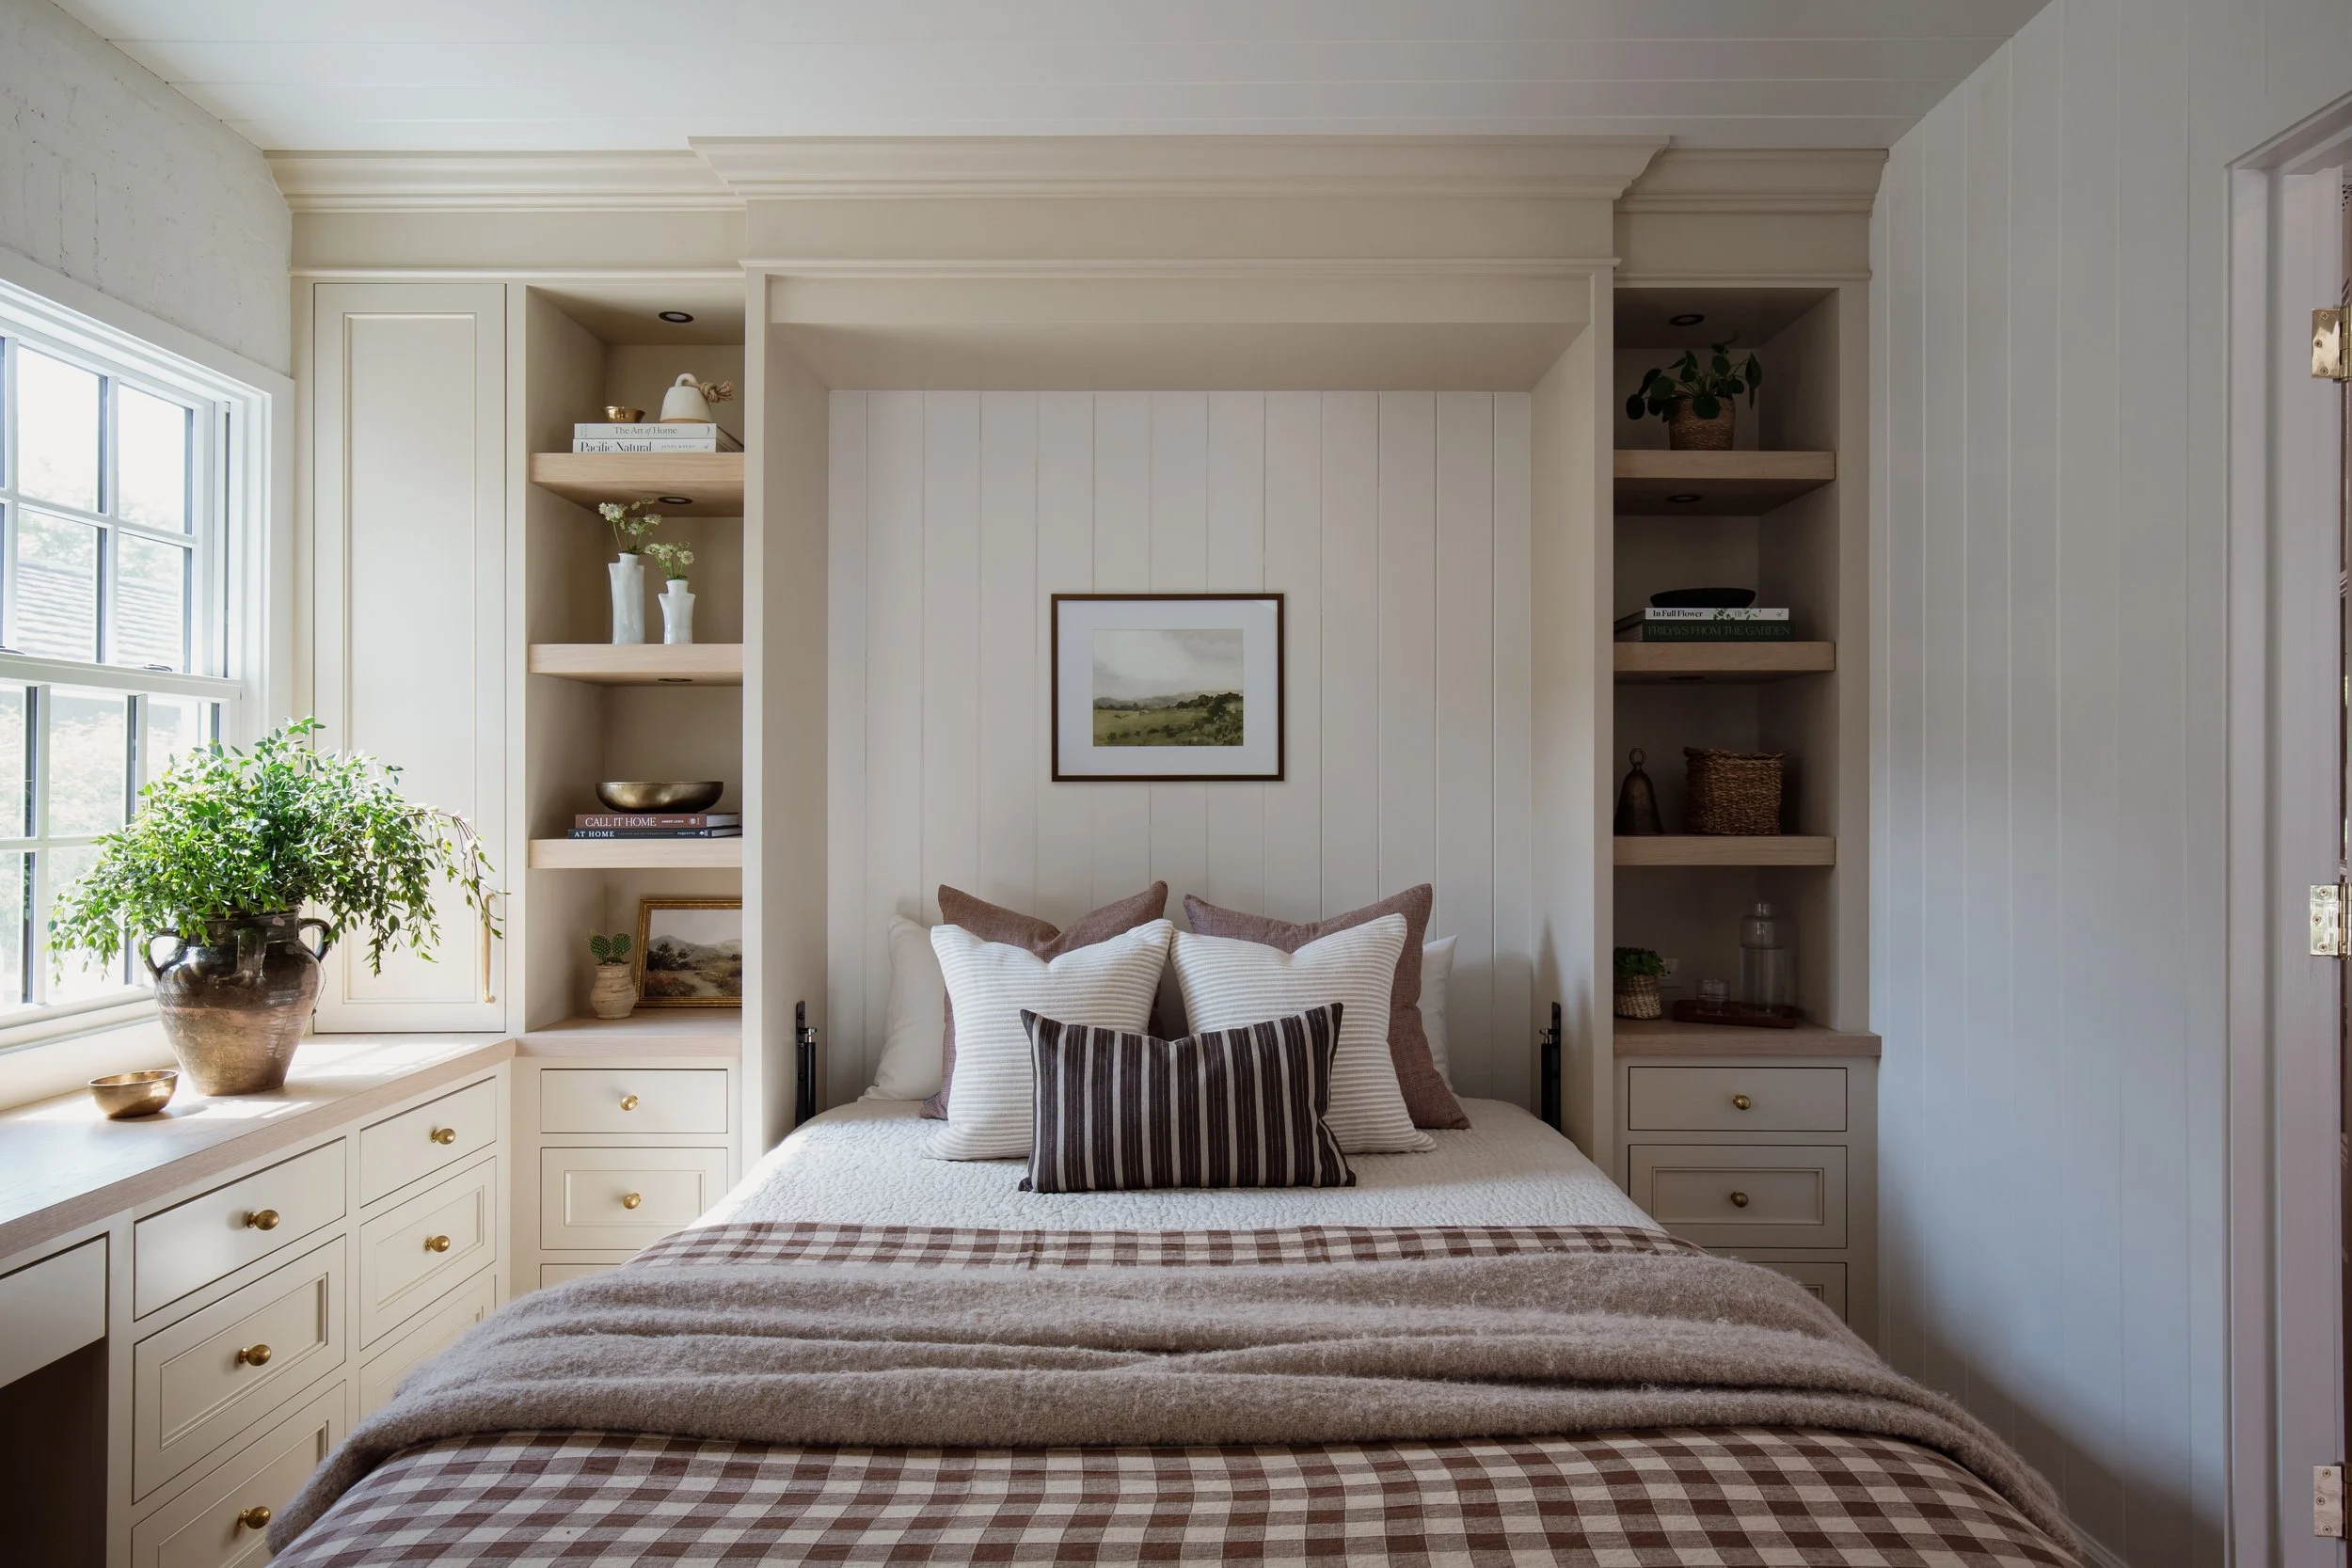
43. Embrace Multipurpose Spaces & Furniture
One of the smartest ways to reduce renovation costs is to make rooms and furniture work harder for you. Designing spaces with multiple uses can help reduce the overall footprint of your home, which can significantly lower building, furnishing and finishing costs. For example, a home office with a Murphy bed can double as a guest bedroom, eliminating the need for a dedicated spare room that may only be used a handful of times each year.
The same thinking applies to furniture. Pieces with built-in storage or dual functionality - like a large ottoman with internal storage, storage beds, extendable dining tables or benches with hidden compartments, can help minimise the amount of custom joinery required throughout the home. And because joinery is often one of the most expensive components of a renovation, reducing even a small amount of cabinetry can lead to meaningful savings without compromising functionality.
Don’t Let Perfection Hold You Back
At the end of the day, renovating doesn’t have to mean choosing between a beautiful home and financial stress. Some of the most impactful spaces come from thoughtful planning, smart decision-making, and knowing where to spend (and where not to...)
Whether you’re tackling a full renovation, refreshing a tired room, or simply trying to make your home function better for the season of life you’re currently in, small strategic choices really do add up. Sometimes it’s sourcing a bargain online or painting the walls yourself over a couple weekends. Sometimes it’s bringing in professional guidance early to avoid expensive mistakes later on and tapping into their industry contacts and trade discounts.
The goal isn’t necessarily perfection. It’s creating a home that supports your everyday life, feels good to be in, and reflects you and your family.
I hope these 42 ideas have given you a few practical ways to stretch your renovation budget a little further, while also giving you the confidence to finally get started on the things you’ve been putting off.
And if you have your own renovation budget tips which haven’t been covered on the list above, I’d love to hear them. Leave them in the comments below - your advice might help someone else navigate their renovation a little more smoothly too 👇
Until next time,
